Understanding the Basics: Eye Shape and Color
Eye shape and color play a significant role in determining the overall appearance and beauty of the eyes. The shape of our eyes can vary greatly, from almond-shaped to round or hooded. Each eye shape has its own unique qualities and features that can be enhanced through the use of makeup techniques. Similarly, eye color adds another layer of complexity to the equation as different shades can complement or contrast with certain makeup looks. By understanding our eye shape and color, we can learn how to accentuate our best features and create stunning eye makeup looks that enhance our natural beauty.
When it comes to eye shape, there are various techniques that can be used to highlight or modify our features. For instance, individuals with almond-shaped eyes often have a balanced and symmetrical appearance, making them an ideal shape for most eye makeup styles. On the other hand, those with round eyes may want to employ techniques that create the illusion of elongation or height, such as elongating the outer corners with eyeliner or emphasizing the crease with eyeshadow. Hooded eyes, where the crease is less visible due to a drooping eyelid, can be enhanced by applying eyeshadow slightly above the natural crease to create the illusion of depth. By understanding our eye shape and learning the appropriate techniques, we can achieve a more balanced and harmonious makeup look.
• Almond-shaped eyes: Ideal shape for most eye makeup styles
• Round eyes: Techniques to create the illusion of elongation or height
– Elongating outer corners with eyeliner
– Emphasizing crease with eyeshadow
• Hooded eyes: Enhancing by applying eyeshadow slightly above natural crease to create depth
Prepping Your Canvas: Proper Eye Care and Hygiene
Proper eye care and hygiene play a crucial role in achieving a flawless eye makeup look. Before diving into the exciting world of eyeshadows and liners, it’s essential to prep your canvas. Start by washing your hands thoroughly to ensure they’re free from any bacteria or dirt that could potentially be transferred to your delicate eye area.
Next, remove any traces of old makeup by using a gentle eye makeup remover. This will help prevent the build-up of product and allow for a fresh start. Be sure to choose a remover that is specifically formulated for the eyes to avoid any irritation or discomfort. Lastly, it’s important to keep your eye tools clean. Regularly wash your brushes and eyelash curler to remove any bacteria and ensure a smooth application. By following these simple steps, you’ll create a clean and healthy foundation for your eye makeup endeavors.
• Wash your hands thoroughly before starting to ensure they’re clean and free from bacteria or dirt.
• Use a gentle eye makeup remover to remove any traces of old makeup for a fresh start.
• Choose an eye makeup remover that is specifically formulated for the eyes to avoid irritation or discomfort.
• Keep your eye tools, such as brushes and eyelash curlers, clean by regularly washing them to remove bacteria.
• Following these steps will create a clean and healthy foundation for flawless eye makeup application.
The Power of Primers: Creating a Smooth Base for Eye Makeup
A crucial step in achieving flawless eye makeup is creating a smooth base with the help of primers. These products not only enhance the longevity of your eye makeup but also provide a seamless canvas for your eyeshadow to glide on. Primers are typically lightweight formulas that are applied to the eyelids before any other eye makeup is added. They work by filling in fine lines, blurring imperfections, and creating a smooth texture that helps prevent creasing and fading throughout the day. By using a primer, you can ensure that your eyeshadow stays vibrant and in place, giving you a long-lasting and polished look.
When selecting a primer, it’s important to consider your specific needs. There are different types of primers available, each catering to different concerns. Some primers are specifically designed to combat oily eyelids and help control excess shine, while others are formulated to brighten the eye area and reduce the appearance of dark circles. Additionally, there are color-correcting primers that can neutralize any discoloration on the eyelids, allowing your eyeshadow colors to pop. By choosing a primer that addresses your specific concerns, you can create the perfect base for your eye makeup, ensuring that it stays in place and looks flawless throughout the day.
• Primers enhance the longevity of your eye makeup
• Primers provide a seamless canvas for eyeshadow application
• They fill in fine lines and blur imperfections
• Primers create a smooth texture to prevent creasing and fading
• Eyeshadow stays vibrant and in place with the use of a primer
When selecting a primer, consider:
• Specific needs such as oily eyelids or dark circles
• Primers designed to combat excess shine or brighten the eye area
• Color-correcting primers that neutralize discoloration on eyelids
By choosing the right primer:
• Create the perfect base for your eye makeup
• Ensure it stays in place throughout the day
• Achieve a flawless look
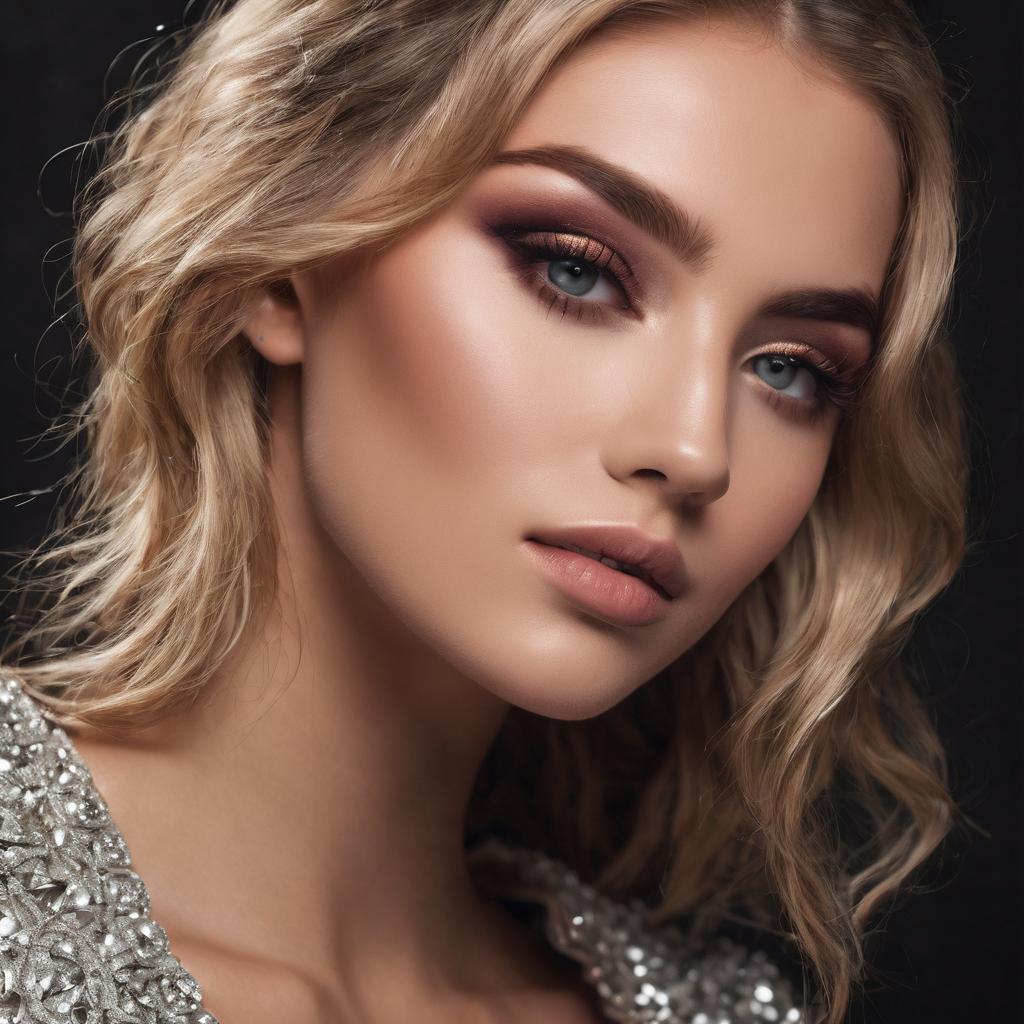
Mastering Eyeshadow Techniques: Blending and Building Colors
Blending and building colors is an essential technique when it comes to mastering eyeshadow application. The key to achieving a seamless and well-blended eye look is to start with a light base shade and gradually layer darker shades. To begin, sweep a neutral shade across your entire lid to create a smooth canvas. Next, choose a slightly deeper shade and apply it in the crease area using a fluffy blending brush. Use windshield wiper motions to blend the color back and forth to create a seamless transition. Repeat this step with gradually deeper shades, focusing the darkest color on the outer corner for added definition. Remember to blend, blend, blend to avoid any harsh lines or patchiness.
Building color intensity is another important aspect of eyeshadow application. Once you have achieved a well-blended base, you can begin to add depth and dimension by layering colors. Start with a lighter shade and pack it onto the lid using a flat, dense brush for maximum color payoff. Then, gradually build up the intensity by layering darker shades on top. This technique allows you to control the intensity of the look and create a beautiful gradient effect. If you want to enhance the vibrancy of your eyeshadow, you can also dampen your brush with a setting spray before applying the product. This will give the color an extra boost and ensure it stays in place all day.
• Start with a light base shade and gradually layer darker shades
• Sweep a neutral shade across the entire lid to create a smooth canvas
• Choose a slightly deeper shade for the crease area
• Use windshield wiper motions to blend the color back and forth for seamless transition
• Repeat with gradually deeper shades, focusing on the outer corner for added definition
• Blend thoroughly to avoid harsh lines or patchiness
Building color intensity:
• Achieve a well-blended base before adding depth and dimension
• Pack lighter shades onto the lid using a flat, dense brush for maximum color payoff
• Gradually layer darker shades on top to build up intensity
• Control the intensity of the look and create a beautiful gradient effect
– Dampen your brush with setting spray before applying eyeshadow to enhance vibrancy
– Ensure eyeshadow stays in place all day
Defining Your Eyes: Tips for Perfecting Eyeliner Application
For many makeup enthusiasts, perfecting eyeliner application is a crucial step in defining the eyes and achieving a polished look. Whether you prefer a subtle line or a bold wing, mastering the art of applying eyeliner can take your eye makeup game to the next level. Here are a few tips to help you achieve a flawless eyeliner application.
Firstly, choose the right type of eyeliner for your desired look. There are various options to choose from, including pencil, gel, liquid, and powder formulas. Pencil liners are great for a soft, natural look, while gel and liquid liners provide a more intense and precise finish. Experiment with different textures to find the one that works best for you. Additionally, consider the color of your eyeliner. While classic black is a staple, don’t be afraid to play with colors that complement your eye shade and overall makeup look. Experimenting with different shades can add a pop of vibrance or create a sultry effect.
• Choose the right type of eyeliner for your desired look: pencil, gel, liquid, or powder formulas.
• Pencil liners are great for a soft, natural look.
• Gel and liquid liners provide a more intense and precise finish.
• Experiment with different textures to find what works best for you.
• Consider the color of your eyeliner – classic black is a staple but don’t be afraid to play with colors that complement your eye shade and overall makeup look.
• Experimenting with different shades can add vibrance or create a sultry effect.
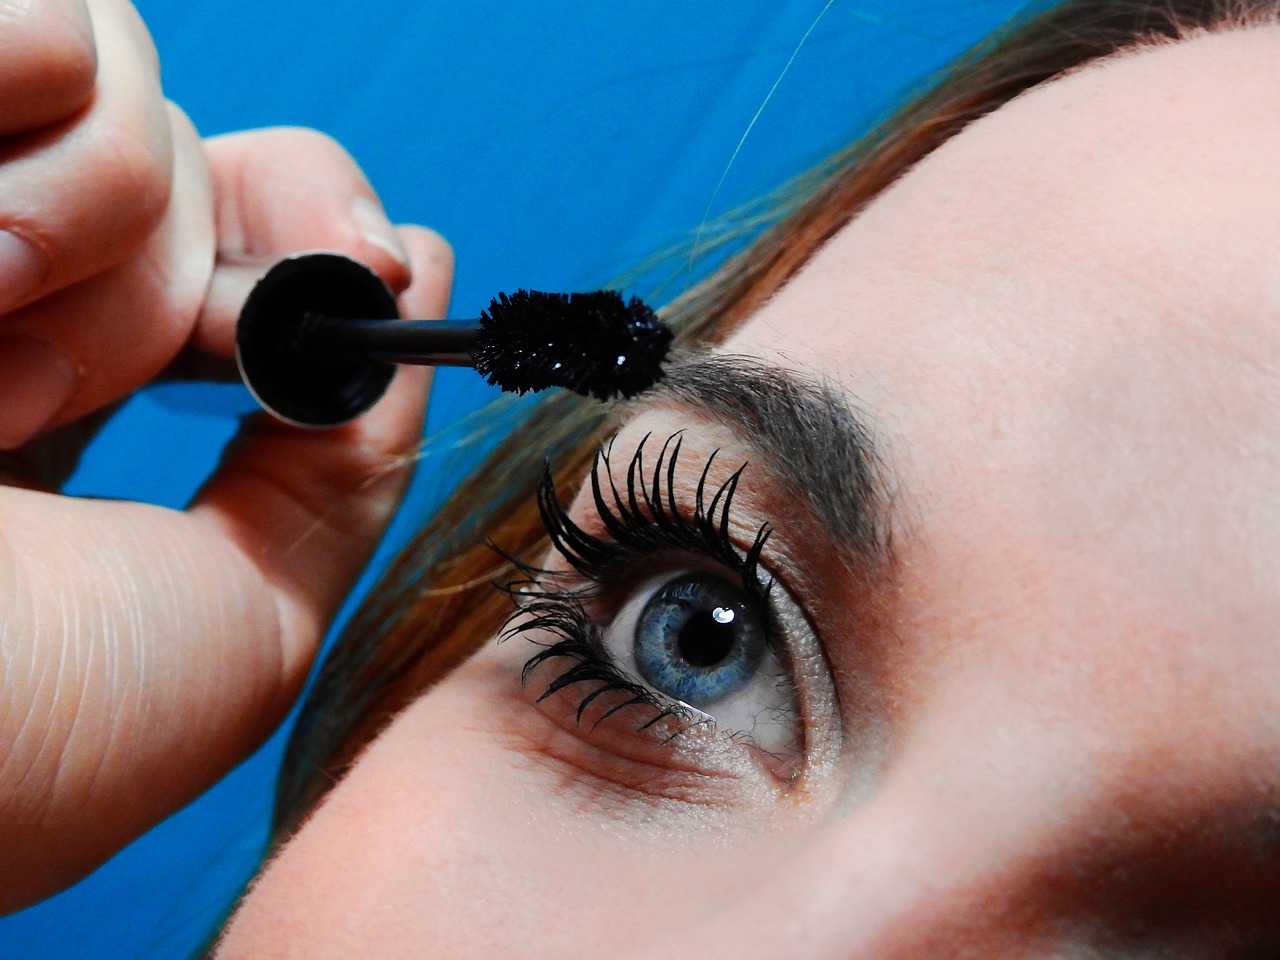
Luscious Lashes: Choosing the Right Mascara and Applying Falsies
Choosing the right mascara can make a world of difference in achieving luscious lashes. With so many options available in the market, it’s important to understand your specific needs and preferences. Some mascaras are designed to add volume and thickness, while others focus on lengthening and separating the lashes. Consider your desired effect and look for mascaras that offer those specific benefits. Additionally, pay attention to the brush shape and bristle type, as these can also greatly influence the application and end result. Experiment with different mascaras to find the one that delivers the look you desire.
When it comes to applying falsies, a few key tips can make the process easier and more successful. Firstly, measure the false lashes against your natural lash line and trim them accordingly to achieve a comfortable fit. Then, apply a thin layer of lash adhesive to the band and wait a few seconds for it to become slightly tacky before placing it as close to your natural lash line as possible. Use your fingers or a pair of tweezers to press the falsies against your lashes for a seamless blend. Remember to curl and coat your natural lashes with mascara before applying falsies to ensure a cohesive and natural look. With practice and patience, you’ll be able to master the art of applying falsies for beautifully enhanced lashes.
• Consider your desired effect: Some mascaras add volume and thickness, while others focus on lengthening and separating the lashes.
• Pay attention to brush shape and bristle type: These can greatly influence application and end result.
• Experiment with different mascaras to find the one that delivers the look you desire.
When applying falsies:
• Measure false lashes against your natural lash line and trim for a comfortable fit.
• Apply a thin layer of lash adhesive to the band, allowing it to become slightly tacky before placing it as close to your natural lash line as possible.
• Use fingers or tweezers to press falsies against your lashes for a seamless blend.
• Curl and coat natural lashes with mascara before applying falsies for a cohesive and natural look.
Brightening and Opening Up: Highlighting the Inner Corner and Brow Bone
To brighten and open up your eyes, highlighting the inner corner and brow bone is key. This technique gives the illusion of bigger, more awake eyes and can instantly transform your overall look. Highlighting the inner corner of your eyes involves applying a light, shimmery eyeshadow or highlighter to the innermost corner of your eye. This will catch the light and make your eyes appear brighter and more refreshed. Similarly, highlighting the brow bone is done by applying a lighter shade of eyeshadow or highlighter just below your eyebrows. This helps to define your brows and draw attention to your eyes, creating a more lifted and youthful appearance. By incorporating these simple techniques into your eye makeup routine, you can instantly brighten and open up your eyes, making them the focal point of your face.
• Highlighting the inner corner and brow bone can give the illusion of bigger, more awake eyes.
• Applying a light, shimmery eyeshadow or highlighter to the innermost corner of your eye catches the light and makes your eyes appear brighter.
• Highlighting the brow bone with a lighter shade of eyeshadow or highlighter just below your eyebrows helps define your brows and draw attention to your eyes.
• These techniques create a more lifted and youthful appearance, making your eyes the focal point of your face.
Perfecting the Smokey Eye: Step-by-Step Guide to Achieving a Classic Look
To achieve a classic smokey eye look, start by applying an eyeshadow primer all over the eyelid. This will help the eyeshadow adhere better and prevent creasing. Next, take a matte eyeshadow in a neutral shade, like taupe or brown, and apply it to the crease as a transition color. Using a fluffy blending brush, blend the color back and forth in a windshield wiper motion to create a seamless gradient.
Once the transition color is in place, choose a darker shade, such as black or dark gray, for the outer corner of the eye. Apply the color using a smaller brush and concentrate it in the outer V shape, where the eyelid and crease meet. Blend the color well to avoid any harsh lines. To intensify the smokey effect, you can also apply the dark eyeshadow along the lower lash line. Finish off the look by adding a highlight shade to the inner corner of the eye and under the brow bone to create dimension and brighten the eyes.
• Apply an eyeshadow primer all over the eyelid to help the eyeshadow adhere better and prevent creasing.
• Use a matte eyeshadow in a neutral shade, like taupe or brown, as a transition color in the crease.
• Blend the transition color back and forth in a windshield wiper motion using a fluffy blending brush for a seamless gradient effect.
• Choose a darker shade, such as black or dark gray, for the outer corner of the eye to add depth and intensity to the smokey eye look.
• Concentrate the darker shade in the outer V shape where the eyelid and crease meet using a smaller brush.
• Blend well to avoid any harsh lines and create a smooth transition between colors.
• For an even more dramatic look, apply some of the dark eyeshadow along your lower lash line as well.
• Add a highlight shade to brighten up your eyes by applying it to your inner corner and under your brow bone.
Experimenting with Color: Creating Eye-catching Looks with Bold Hues
Bold and vibrant hues can add a pop of excitement and creativity to any eye makeup look. Experimenting with color allows you to showcase your unique style and create eye-catching looks that truly stand out. Whether you prefer a subtle touch of color or a more dramatic and bold statement, there are endless possibilities to explore.
One way to incorporate bold hues into your eye makeup is by using vibrant eyeshadows. Opt for shades like electric blue, emerald green, or fiery orange to make a striking impact. Blend these bold colors onto the eyelids, building the intensity gradually for a seamless and polished look. Don’t be afraid to mix and match different shades to create a mesmerizing color gradient or experiment with contrasting colors for a captivating, high-contrast effect.
To enhance the boldness of your eye makeup, consider incorporating colored eyeliners into your routine. Bold hues like royal purple, neon pink, or golden yellow can add an unexpected twist to your overall look. Apply a thin line along the upper or lower lash line to instantly elevate your eye makeup. Alternatively, you can experiment with a graphic eyeliner look, combining different colored liners to create unique shapes and designs. This will surely make a bold statement and turn heads wherever you go.
• Experiment with vibrant eyeshadows in shades like electric blue, emerald green, or fiery orange
• Blend the bold colors onto the eyelids gradually for a seamless and polished look
• Mix and match different shades to create a mesmerizing color gradient
• Try experimenting with contrasting colors for a captivating, high-contrast effect
• Incorporate colored eyeliners into your routine to enhance the boldness of your eye makeup
• Opt for bold hues like royal purple, neon pink, or golden yellow
• Apply a thin line along the upper or lower lash line to instantly elevate your eye makeup
• Consider trying a graphic eyeliner look by combining different colored liners to create unique shapes and designs
Finishing Touches: Eyebrow Grooming and Enhancing Your Eye Makeup Look
Eyebrow grooming is a crucial step in enhancing your eye makeup look. Well-groomed eyebrows frame the eyes and give the face a polished appearance. Start by determining the shape that suits your face best. Whether you prefer a defined arch, a soft curve, or a straighter shape, always aim for symmetry. Tweeze any stray hairs and fill in sparse areas with a pencil or powder that matches your natural brow color. Brush your eyebrows upwards using a spoolie brush to create a natural, fuller look. Remember to avoid over-plucking, as sparse brows can make you look older and unbalanced. Finally, set your brows in place with a clear or tinted brow gel for a long-lasting finish.
To truly enhance your eye makeup, it is essential to find the perfect brow shape that complements your face. The shape of your eyebrows can change your overall appearance and even make your eyes appear larger or more defined. Taking the time to groom and shape your brows will go a long way in creating a polished and professional look. Experiment with different techniques such as using stencils, waxing, or threading to achieve the desired shape that suits you best. Remember, well-groomed eyebrows are the ultimate finishing touch to your eye makeup look.
• Determine the shape that suits your face best
• Aim for symmetry when shaping your brows
• Tweeze any stray hairs and fill in sparse areas with a matching pencil or powder
• Brush eyebrows upwards for a natural, fuller look
• Avoid over-plucking to prevent sparse brows and an unbalanced appearance
• Set your brows in place with clear or tinted brow gel for long-lasting results
To truly enhance your eye makeup, finding the perfect brow shape is crucial.
The shape of your eyebrows can change your overall appearance and make your eyes appear larger or more defined.
Take the time to groom and shape your brows using different techniques such as stencils, waxing, or threading.
Experiment to find the desired shape that suits you best.
Well-groomed eyebrows are the ultimate finishing touch to complete your eye makeup look.