Choosing the Right Eyeshadow Shades

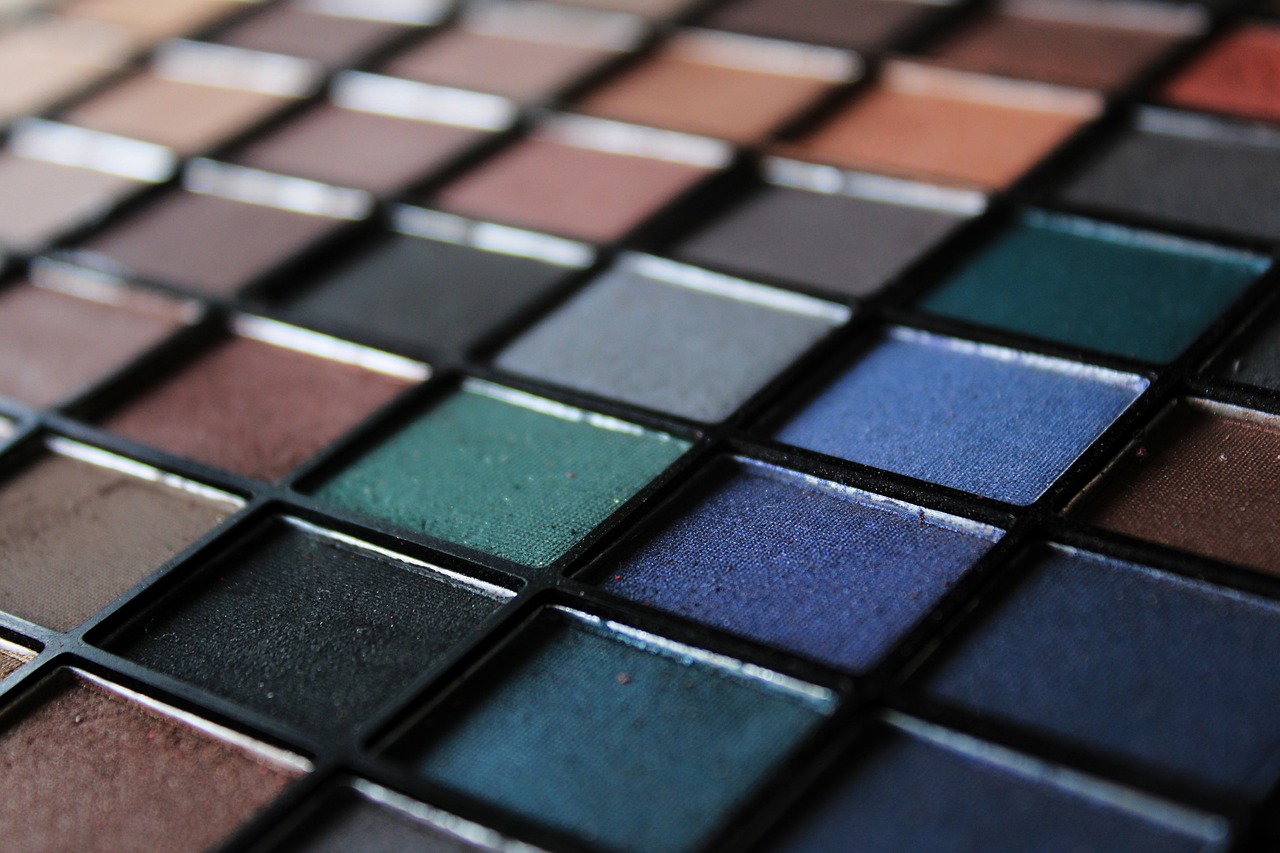
When it comes to choosing the right eyeshadow shades, there are a few factors to consider. Firstly, it’s important to take into account your skin tone. If you have fair skin, light pastels and neutral shades tend to work well, while those with medium skin tones can experiment with warm earthy tones and metallic shades. For those with deeper skin tones, rich jewel tones and bold colors can create a stunning contrast.
Another important factor to consider is your eye color. Certain shades can enhance and complement your natural eye color, making them pop even more. For instance, if you have blue eyes, earthy tones like copper and bronze can bring out the blue hues. Green and hazel eyes may be accentuated with purple or mauve shades. Brown eyes can easily pull off a wide range of colors, from warm browns to cool blues and greens. By taking into consideration your skin tone and eye color, you can select eyeshadow shades that flatter your features and enhance your overall look.
• Fair skin: light pastels and neutral shades
• Medium skin tones: warm earthy tones and metallic shades
• Deeper skin tones: rich jewel tones and bold colors
• Blue eyes: copper and bronze shades
• Green and hazel eyes: purple or mauve shades
• Brown eyes: wide range of colors, from warm browns to cool blues and greens
Applying Eyeshadow Primer for Longer-Lasting Makeup
Eyeshadow primer is an essential step in any makeup routine as it helps to create a smooth and even base for your eyeshadow application. Not only does it prevent your eyeshadow from creasing or fading, but it also helps to intensify the pigmentation of the colors. To apply eyeshadow primer, start by cleansing and moisturizing your eyelids. Then, take a small amount of primer and gently pat it onto your eyelids, focusing on the areas where you plan to apply eyeshadow. Allow the primer to dry for a few seconds before proceeding with the rest of your makeup routine. By using an eyeshadow primer, you can ensure that your eye makeup stays in place all day long, without any smudging or budging.
One of the benefits of using an eyeshadow primer is that it can help to enhance the longevity of your eyeshadow. Without a primer, eyeshadow can easily fade or crease, especially if you have oily eyelids. The primer forms a barrier between your skin and the eyeshadow, preventing oil from coming into contact with the pigments and causing them to break down. This means that your eyeshadow will not only last longer, but it will also look brighter and more vibrant throughout the day. Whether you’re heading to a special event or simply want your eye makeup to stay put all day, using an eyeshadow primer is a simple yet effective way to ensure long-lasting and flawless eye looks.
• Eyeshadow primer creates a smooth and even base for eyeshadow application
• It prevents eyeshadow from creasing or fading
• Eyeshadow primer intensifies the pigmentation of colors
• Start by cleansing and moisturizing your eyelids before applying primer
• Gently pat a small amount of primer onto your eyelids, focusing on areas where you’ll apply eyeshadow
• Allow the primer to dry for a few seconds before continuing with your makeup routine
• Using an eyeshadow primer ensures that your eye makeup stays in place all day without smudging or budging
Benefits of using an eyeshadow primer:
– Enhances the longevity of eyeshadow
– Prevents fading and creasing, especially for those with oily eyelids
– Forms a barrier between skin and eyeshadow, preventing oil from breaking down pigments
– Makes eyeshadows look brighter and more vibrant throughout the day
– Ensures long-lasting and flawless eye looks for special events or everyday wear
Using the Proper Brushes for Different Eye Makeup Techniques
There are various eye makeup techniques that can help you achieve different looks, but using the right brushes is essential to ensure precise application and flawless results. When it comes to eyeshadow application, there are a few key brushes that you should have in your collection.
Firstly, a flat shader brush is perfect for packing color onto the eyelid. With its dense bristles, it allows you to build intensity and create a vibrant eye look. Additionally, a fluffy blending brush is a must-have for seamlessly blending different eyeshadow shades. This versatile brush helps to soften harsh lines and create a smooth transition between colors. Lastly, a small angled brush is essential for precise eyeliner application. It allows you to create sharp, defined lines or even achieve a winged eyeliner look effortlessly. By having these different brushes in your arsenal, you can easily master various eye makeup techniques and achieve professional-looking results.
• A flat shader brush is perfect for packing color onto the eyelid
• Dense bristles allow you to build intensity and create a vibrant eye look
• A fluffy blending brush helps to seamlessly blend different eyeshadow shades
• Softens harsh lines and creates a smooth transition between colors
• A small angled brush is essential for precise eyeliner application
• Allows you to create sharp, defined lines or achieve a winged eyeliner look effortlessly
Blending Eyeshadow for a Seamless Look

Once you have applied your base eyeshadow color and any additional shades, it is crucial to blend them together for a seamless look. Blending is the key to achieving a professional and polished eye makeup look. To blend your eyeshadow effectively, start by using a clean, fluffy blending brush. Make small circular motions along the crease of your eyelid, gradually working the brush upward and outward. This technique helps to soften any harsh lines and creates a seamless transition between different eyeshadow shades. Remember to blend with a light hand and build up the intensity gradually to ensure a natural and effortless finish.
In addition to using a blending brush, you can also use your fingertips to blend eyeshadow for a seamless look. Gently tap your finger onto the eyeshadow and then softly massage it onto your eyelid. This method allows the warmth of your fingertips to melt the eyeshadow and blend it seamlessly into the surrounding colors. It is particularly effective when working with cream or pressed pigment eyeshadows. Remember to blend in small, controlled movements and blend outwards to ensure a cohesive and well-blended eyeshadow look.
• Use a clean, fluffy blending brush to blend eyeshadow
• Make small circular motions along the crease of your eyelid
• Gradually work the brush upward and outward for a seamless transition between shades
• Blend with a light hand and build up intensity gradually for a natural finish
• Use fingertips to blend eyeshadow by tapping onto the lid and massaging it softly
• Allow the warmth of your fingertips to melt the eyeshadow into surrounding colors
• This method is particularly effective with cream or pressed pigment eyeshadows
• Blend in small, controlled movements and blend outwards for a cohesive look.
Creating Definition with Eyeliner
Eyeliner is a versatile and essential tool when it comes to creating definition and enhancing the shape of your eyes. Whether you prefer a bold and dramatic look or a more subtle and natural one, eyeliner can be used to achieve both. By applying eyeliner along the lash line, you can instantly make your lashes appear thicker and your eyes more defined.
To create a precise line, opt for a liquid or gel eyeliner and use short, controlled strokes to gradually build up the intensity. Start from the inner corner of your eye and work your way outward, staying as close to the lash line as possible. For a smudged and smoky effect, consider using a pencil or eyeshadow as eyeliner and gently smudge the line using a smudging brush or your fingertip. Regardless of the technique you choose, eyeliner is a fantastic tool for enhancing your eyes and giving them a captivating, defined look.
• Eyeliner is a versatile and essential tool for creating definition in your eye makeup.
• It can be used to achieve both bold and dramatic looks as well as subtle and natural ones.
• Applying eyeliner along the lash line instantly makes lashes appear thicker and eyes more defined.
• To create a precise line, opt for liquid or gel eyeliner and use short, controlled strokes.
• Start from the inner corner of the eye and work outward, staying close to the lash line.
• For a smudged and smoky effect, consider using a pencil or eyeshadow as eyeliner.
• Use a smudging brush or fingertip to gently smudge the line for that desired effect.
• Regardless of technique chosen, eyeliner enhances eyes by giving them captivating definition.
Enhancing Lashes with Mascara
Achieving voluminous and fluttery lashes can instantly transform your eyes and enhance your overall makeup look. Mascara is a go-to product for achieving this effect, as it adds length, volume, and definition to your lashes. To enhance your lashes with mascara, start by choosing a formula that suits your needs. There are volumizing mascaras that give a fuller, thicker look, lengthening mascaras that elongate the lashes, and waterproof mascaras that offer long-lasting wear. Experiment with different options to find the one that works best for you.
Before applying mascara, make sure to curl your lashes with an eyelash curler. This step helps to open up your eyes and create a wider, more awake appearance. When applying the mascara, start at the base of the lashes and wiggle the wand back and forth to coat each lash evenly. Then, gently comb through the lashes with the mascara wand to separate them and prevent clumping. For a more dramatic effect, apply multiple coats, allowing each coat to dry before applying the next one. Finally, remember to remove your mascara at the end of the day to maintain the health of your lashes and prevent any potential eye irritation.
• Choose a mascara formula that suits your needs: volumizing, lengthening, or waterproof.
• Curl your lashes with an eyelash curler before applying mascara to open up your eyes.
• Start at the base of the lashes and wiggle the wand back and forth to coat each lash evenly.
• Gently comb through the lashes with the mascara wand to separate them and prevent clumping.
• For a more dramatic effect, apply multiple coats, allowing each coat to dry before applying the next one.
• Remove your mascara at the end of the day to maintain lash health and prevent eye irritation.
Adding Depth with Eyeliner Techniques

Mastering the art of applying eyeliner is essential for achieving a dramatic and eye-catching eye makeup look. By using various techniques, you can add depth and dimension to your eyes and make them appear bigger and more defined.
One technique to create depth with eyeliner is tightlining. This involves applying a thin line of eyeliner along the upper lash line, filling in the gaps between the lashes. Tightlining not only adds depth but also gives the illusion of thicker and fuller lashes. To achieve this technique, gently lift your eyelid and carefully apply the eyeliner as close to the roots of the lashes as possible. This technique is great for a subtle and natural-looking enhancement to your eyes.
Another technique to add depth with eyeliner is the classic winged eyeliner. This timeless look is achieved by extending the eyeliner beyond the outer corner of the eye, creating a cat-eye effect. To achieve this look, start by drawing a thin line along the upper lash line, gradually increasing the thickness as you reach the outer corner. Then, using the flicking motion, extend the line upwards and outwards. This technique instantly adds drama and depth to your eyes, making them appear more alluring and captivating.
• Tightlining is a technique that involves applying eyeliner along the upper lash line, filling in gaps between lashes
• Gives the illusion of thicker and fuller lashes
• Lift eyelid gently and apply eyeliner as close to lash roots as possible for best results
• Creates a subtle and natural enhancement to eyes
• Winged eyeliner is a classic technique for adding depth and drama to eyes
• Extend the liner beyond outer corner of eye for a cat-eye effect
• Start with thin line along upper lash line, gradually increasing thickness towards outer corner
• Use flicking motion to extend line upwards and outwards
• Instantly makes eyes appear more alluring and captivating
Highlighting the Inner Corner of the Eye for a Brighter Look
Highlighting the inner corner of the eye is an essential step in achieving a brighter and more awake look. This simple trick can make a world of difference in enhancing your overall eye makeup. By adding a touch of light to this area, you can instantly open up your eyes and give them a youthful radiance.
To achieve this effect, opt for a highlighting shade that is lighter than your skin tone. This could be a shimmery champagne or a pearly white shade. Using a small brush or the tip of your finger, gently dab the highlighter into the inner corner of your eye, where the tear duct is located. Blend it softly for a seamless transition into the rest of your eyeshadow. The result will be a subtle glow that instantly brightens your eyes and makes them appear more vibrant. So, don’t forget to incorporate this quick and easy step into your eye makeup routine for a fresh and captivating look.
• Highlighting the inner corner of the eye is a crucial step for a brighter look
• This trick enhances overall eye makeup and opens up the eyes
• Using a highlighting shade lighter than your skin tone is key
• Shimmery champagne or pearly white shades work well for this purpose
• Apply the highlighter with a small brush or fingertip to the tear duct area
• Gently blend it for a seamless transition into the rest of your eyeshadow
• The result will be a subtle glow that instantly brightens and revitalizes your eyes
• Incorporating this step into your routine can give you a fresh and captivating look.
Utilizing Eyebrow Makeup for a Polished Finish
When it comes to achieving a polished and put-together look, it is important not to overlook the role that eyebrows play. Properly groomed and defined eyebrows can enhance your facial features and give your overall makeup look a polished finish. Utilizing eyebrow makeup is a great way to achieve this.
One of the key steps in utilizing eyebrow makeup is to find the right shade that matches your natural brow color. This will ensure that your brows look natural and not overly drawn in. Whether you prefer using an eyebrow pencil, powder, or gel, make sure to choose a shade that complements your hair color and skin tone. By filling in any sparse areas and defining the shape of your brows, you can create a clean and polished look that frames your face beautifully. Remember to blend the product gently with a spoolie brush for a seamless finish.
• Finding the right shade is essential for a natural look
• Choose an eyebrow product that suits your preference (pencil, powder, or gel)
• Select a shade that complements your hair color and skin tone
• Fill in sparse areas and define the shape of your brows for a clean look
• Use a spoolie brush to blend the product for a seamless finish
In addition to finding the right shade, it’s important to consider the overall shape of your eyebrows. The shape of your brows can greatly impact how polished and put-together you look. To achieve a polished finish, start by determining where your eyebrows should begin and end. This can be done by using a straight edge such as an eyebrow pencil or ruler. Place it vertically against one side of your nose and align it with the inner corner of your eye; this is where your brow should start. Repeat on the other side.
Next, determine where your arch should be located. For most people, this will be above the outer edge of their iris when looking straight ahead. Mark this point lightly with an eyebrow pencil.
Finally, find out where your brow should end by placing the straight edge diagonally from one nostril to the outer corner of your eye. The point at which it intersects with your brow bone is where it should end.
Once you have determined these key points, use an eyebrow pencil or powder to fill in any sparse areas and create definition along the natural shape of your brows. Avoid creating harsh lines by using short strokes that mimic hair strands.
To ensure long-lasting results and keep stray hairs in place throughout the day, consider setting them with clear or tinted eyebrow gel after filling them in. This will give them added structure while also keeping them looking groomed.
Overall, utilizing eyebrow makeup is crucial for achieving a polished finish in any makeup look. By choosing the right shade that matches both hair color and skin tone, defining the shape of your brows, and setting them with gel, you can enhance your facial features and create a polished look that frames your face beautifully. So don’t forget to pay attention to your eyebrows when doing your makeup – they truly make a difference!
Removing Eye Makeup Properly to Maintain Healthy Skin

To maintain healthy and radiant skin, it is essential to remove eye makeup properly. One common mistake people make is rushing through the process, leading to leftover traces of makeup on the delicate skin around the eyes. This can clog the pores, potentially leading to breakouts and irritation. To avoid this, it is crucial to take the time to remove eye makeup thoroughly every night.
Start by using a gentle and effective eye makeup remover. Look for a product specifically formulated for the sensitive eye area, as these are designed to remove makeup without causing any harm. Apply a small amount of the remover onto a cotton pad and gently press it onto your closed eyelid. Allow the remover to dissolve the makeup for a few seconds before gently wiping it away. Repeat this process until all traces of eye makeup are gone. Remember to be extra gentle when removing mascara to prevent any pulling or tugging on the lashes.
• Use a gentle and effective eye makeup remover specifically formulated for the sensitive eye area.
• Apply a small amount of the remover onto a cotton pad.
• Gently press the cotton pad onto your closed eyelid.
• Allow the remover to dissolve the makeup for a few seconds.
• Gently wipe away the dissolved makeup, repeating as necessary until all traces are gone.
• Be extra gentle when removing mascara to prevent pulling or tugging on lashes.