Prepping Your Skin: The Foundation for Flawless Makeup
One of the key steps to achieving flawless makeup is properly prepping your skin. Before applying any products, it’s important to cleanse your face thoroughly to remove dirt, oil, and any remnants of previous makeup. This step helps create a clean canvas, allowing your foundation to be applied smoothly and evenly.
After cleansing, it’s essential to moisturize your skin to ensure it stays hydrated throughout the day. Choose a moisturizer that suits your skin type, whether it’s oily, dry, or combination. Moisturizing helps to plump and nourish the skin, creating a smooth surface for your foundation and other makeup products. Additionally, it can help reduce the appearance of fine lines and wrinkles, making your makeup application look more youthful and fresh.
• Cleansing your face thoroughly removes dirt, oil, and remnants of previous makeup
• Clean canvas allows foundation to be applied smoothly and evenly
• Moisturizing keeps skin hydrated throughout the day
• Choose a moisturizer that suits your skin type (oily, dry, or combination)
• Plumps and nourishes the skin for a smooth surface for makeup application
• Reduces appearance of fine lines and wrinkles
• Gives a more youthful and fresh look to your makeup
Choosing the Right Products: Understanding Your Skin Type and Undertones
Understanding your skin type and undertones is essential when it comes to selecting the right makeup products. Your skin type plays a crucial role in determining the kind of products that will work best for you. Whether you have dry, oily, combination, or sensitive skin, there are specific formulations designed to cater to your unique needs. It’s important to consider factors like hydration, coverage, and longevity to ensure that your makeup stays put and looks flawless throughout the day.
In addition to your skin type, understanding your undertones is equally important in choosing the right products. Undertones refer to the subtle hues that lie beneath the surface of your skin. These undertones can be categorized as warm, cool, or neutral. Determining your undertone can help you find the most flattering shades of foundation, concealer, blush, and other makeup products. For example, if you have warm undertones, you’ll likely gravitate towards shades with yellow or golden undertones, while those with cool undertones may opt for products with pink or blue undertones. By understanding your skin type and undertones, you can confidently select products that enhance your natural beauty and create a flawless canvas for your makeup application.
• Dry skin: Look for moisturizing and hydrating formulas to prevent flakiness and improve the overall texture of your skin.
• Oily skin: Opt for oil-free or mattifying products that help control shine and keep your makeup in place throughout the day.
• Combination skin: Consider using a combination of products, such as a lightweight moisturizer for dry areas and oil-absorbing products for oily zones.
• Sensitive skin: Choose hypoallergenic and fragrance-free options to minimize irritation and potential allergic reactions.
• Warm undertones: Look for foundations with shades like golden beige, peachy pink, or earthy tones. These colors will complement your complexion beautifully.
• Cool undertones: Seek out foundations with rosy pink, porcelain, or blue-based shades. These hues will enhance your natural coolness without appearing too warm on your face.
• Neutral undertones: You have the flexibility to experiment with both warm and cool-toned foundation shades. Opt for neutral beige or ivory tones that balance both warmth and coolness.
By considering both your skin type and undertones when selecting makeup products, you can ensure that they not only suit you but also enhance your natural features. Remember to test out samples before committing to a full-size product to see how it reacts with your unique complexion. With the right understanding of what works best for you, achieving a flawless makeup look becomes much easier!
Creating a Solid Base: Mastering the Art of Foundation Application
To create a flawless base for your makeup, mastering the art of foundation application is essential. Foundation is the canvas upon which you will build your entire look, so it’s important to get it right.
Start by selecting a foundation that matches your skin tone perfectly. To do this, swatch a few shades on your jawline and choose the one that seamlessly blends in. Once you have the right shade, use clean fingers or a makeup brush to apply small dots of foundation on your forehead, cheeks, nose, and chin. Then, blend it outwards using gentle strokes, ensuring even coverage. Remember to blend down your neck as well to avoid any visible lines. By practicing these techniques, you’ll be well on your way to creating a solid base for your makeup.
• Select a foundation that matches your skin tone perfectly
• Swatch a few shades on your jawline and choose the one that seamlessly blends in
• Apply small dots of foundation on your forehead, cheeks, nose, and chin
• Use clean fingers or a makeup brush to blend the foundation outwards using gentle strokes
• Ensure even coverage by blending down your neck as well
• Practice these techniques to create a solid base for your makeup
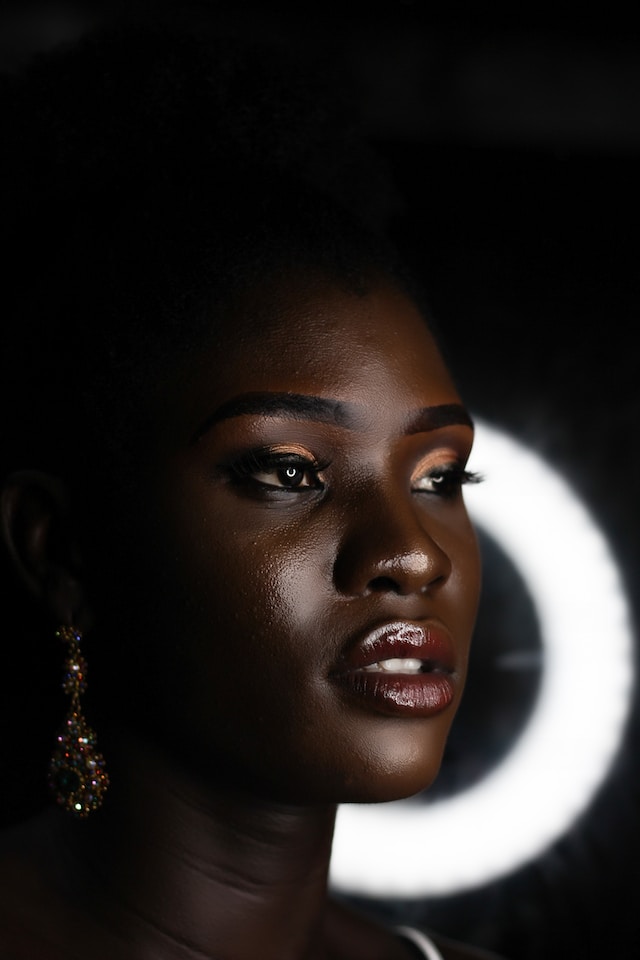
Enhancing Your Features: Highlighting and Contouring Techniques
Highlighting and contouring are essential techniques in makeup application that can transform your face and enhance your features. Highlighting involves using a lighter shade to bring forward specific areas of your face, while contouring uses a darker shade to create depth and definition. These techniques can help to sculpt the face, create the illusion of higher cheekbones, a slimmer nose, and a more defined jawline.
When highlighting, focus on areas that naturally catch the light, such as the tops of your cheekbones, the bridge of your nose, and the cupid’s bow of your lips. Apply a highlighting product, such as a powder, cream, or liquid, and gently blend it in with a brush or sponge. This will help to brighten those areas and give your face a luminous glow. Contouring, on the other hand, involves applying a darker shade to the areas you want to create shadows, such as the hollows of your cheeks, the sides of your nose, and the perimeter of your face. Use a contouring product that complements your skin tone, and blend it carefully to achieve a natural-looking shadow effect.
• Highlighting and contouring are essential techniques in makeup application
• Highlighting involves using a lighter shade to bring forward specific areas of your face
• Contouring uses a darker shade to create depth and definition
• These techniques can help sculpt the face and enhance features
• Areas to highlight include cheekbones, bridge of nose, and cupid’s bow of lips
• Apply highlighting product and blend with brush or sponge for a luminous glow
• Contouring involves applying a darker shade to create shadows in desired areas
• Hollows of cheeks, sides of nose, and perimeter of face are common contouring areas
• Choose a contouring product that complements your skin tone
• Blend carefully for natural-looking shadow effect.
Perfecting Your Brows: Shaping and Filling for a Polished Look
Eyebrows play a crucial role in framing and defining our facial features, so getting them in perfect shape is essential for a polished look. Shaping your brows involves finding the right arch that suits your face shape and enhancing your natural shape by plucking or waxing any stray hairs. To achieve a well-groomed look, it’s advisable to seek professional help, such as visiting a salon or a brow specialist, who can help you determine the ideal shape for your brows based on your facial structure and personal preferences. Alternatively, you can also shape your brows at home using tweezers, but make sure to be cautious and only remove stray hairs that are outside the desired shape.
Once you have achieved the desired shape, filling in your brows can help define and add depth to them. Using an eyebrow pencil or powder that matches your natural hair color, gently fill in any sparse areas or gaps in your brows. It’s important to follow the natural direction and growth pattern of your brow hair to create a more natural-looking result. Use light, feathery strokes rather than heavy-handed ones to avoid a harsh or unnatural appearance. Remember to blend the product well for a seamless finish that gives the illusion of naturally full and shaped brows.
• Shaping your brows involves finding the right arch for your face shape
• Seek professional help from a salon or brow specialist for ideal results
• Alternatively, shape your brows at home with caution using tweezers
• Fill in sparse areas or gaps in your brows using an eyebrow pencil or powder
• Choose a shade that matches your natural hair color
• Follow the natural direction and growth pattern of your brow hair
• Use light, feathery strokes to avoid a harsh or unnatural appearance
• Blend the product well for a seamless finish
Accentuating Your Eyes: Tips for Eyeshadow Application and Eyeliner Techniques
Begin paragraph 1: When it comes to accentuating your eyes, mastering the art of eyeshadow application and eyeliner techniques is essential. These two elements can truly elevate your eye makeup and create a striking look. Let’s delve into a few tips that can help you achieve the desired effect.
Paragraph 2: First and foremost, when applying eyeshadow, it is crucial to start with a primer. This will not only help the eyeshadow adhere better to your eyelids but also make the colors more vibrant and long-lasting. Select a primer that suits your skin type and undertones. Once the primer is applied, you can begin working with your eyeshadow palette, choosing shades that complement your eye color and desired outcome. Remember to start with lighter shades as a base and gradually build up the intensity. And don’t be afraid to experiment with different techniques such as blending and layering to achieve a multidimensional look.
• Start with a primer to help the eyeshadow adhere better and make colors more vibrant and long-lasting.
• Choose a primer that suits your skin type and undertones.
• Select eyeshadow shades that complement your eye color and desired outcome.
• Begin with lighter shades as a base, gradually building up intensity.
• Experiment with blending and layering techniques for a multidimensional look.
Luscious Lips: Achieving a Statement Pout with Lipstick and Lip Liner
To achieve a statement pout with lipstick and lip liner, it is important to start with a well-prepped base. Begin by exfoliating your lips to remove any dry or flaky skin, ensuring a smooth canvas for the products. Follow it up with a moisturizing lip balm to keep your lips hydrated and plump.
Next, choose a lip liner that complements your lipstick shade. Start by outlining your lips, following the natural shape for a more precise application. Then, carefully fill in your lips with the liner to create a base that will help your lipstick last longer and prevent it from bleeding or feathering.
Now it’s time for the lipstick! Using a lip brush, apply the color evenly to your lips. Start at the center of your lips and work your way outwards, following the shape of your lip liner. For a bolder look, you can apply multiple layers, blotting your lips with a tissue in between to remove any excess product.
Remember, the key to achieving a statement pout is to find the perfect balance between the lip liner and lipstick. Experiment with different shades and textures to find the combination that enhances your natural features and complements your overall makeup look. With practice and the right products, you’ll be rocking luscious lips that make a lasting impression.
• Exfoliate your lips to remove dry or flaky skin
• Apply a moisturizing lip balm to keep your lips hydrated and plump
• Choose a lip liner that complements your lipstick shade
• Outline your lips with the lip liner, following the natural shape for precision
• Fill in your lips with the liner to create a base for longer-lasting color
• Prevent bleeding or feathering by using the lip liner as a barrier
• Use a lip brush to apply lipstick evenly, starting from the center of your lips
• Work outwards, following the shape created by the lip liner
• For a bolder look, layer multiple coats of lipstick and blot excess product with tissue
• Experiment with different shades and textures to find what enhances your features
Blushing Beauty: How to Apply Blush and Bronzer for a Natural Glow
When it comes to creating a natural glow, applying blush and bronzer can make all the difference. Blush adds a pop of color to the cheeks, while bronzer adds depth, warmth, and a sun-kissed look. To achieve a natural glow, start by selecting the right shades for your skin tone. Fair skin typically looks best with light pink or peach blushes, while medium skin tones can go for rose or coral shades. For deeper skin tones, opt for deeper pinks or berries.
Next, choose a bronzer that is not too dark or too light for your complexion. Look for a shade that is one to two shades darker than your skin to create a subtle contour effect. When applying blush, smile to locate the apples of your cheeks and gently sweep the color upwards towards your temples. Remember to blend well to avoid any harsh lines. For bronzer, lightly dust it along the hollows of your cheeks, temples, and jawline for a natural shadow effect. Blend well to create a seamless transition between the bronzer and your skin for a sun-kissed glow.
• Select the right shades for your skin tone:
– Fair skin: light pink or peach blushes
– Medium skin tones: rose or coral shades
– Deeper skin tones: deeper pinks or berries
• Choose a bronzer that matches your complexion:
– Not too dark or too light
– One to two shades darker than your skin
• Applying blush:
– Smile to locate the apples of your cheeks
– Gently sweep the color upwards towards your temples
– Blend well to avoid harsh lines
• Applying bronzer:
– Lightly dust along hollows of cheeks, temples, and jawline
– Create a natural shadow effect for contouring
– Blend well for a seamless transition between bronzer and skin
Setting Your Makeup: Techniques for Long-Lasting Looks
To ensure that your makeup stays put all day long, setting your makeup is a crucial step in your beauty routine. One popular technique for a long-lasting look is to use a setting spray. Setting sprays are specially formulated to lock in your makeup, preventing it from fading or smudging throughout the day. Simply mist the setting spray evenly over your face after applying your makeup to keep it in place.
Another technique for setting your makeup is to use a translucent powder. Translucent powders are finely milled and colorless, making them perfect for setting your foundation without adding any additional coverage. Using a fluffy brush, gently sweep the powder over your face, paying extra attention to areas that tend to get oily or crease, such as the T-zone. The powder will absorb excess oil and help your makeup stay matte and fresh for hours. Remember to blend the powder well to avoid a cakey finish.
• Use a setting spray to lock in your makeup and prevent fading or smudging throughout the day.
• Mist the setting spray evenly over your face after applying your makeup for best results.
• Translucent powders are great for setting foundation without adding additional coverage.
• Gently sweep the powder over your face using a fluffy brush, focusing on oily or crease-prone areas like the T-zone.
• The powder will absorb excess oil and keep your makeup looking matte and fresh for hours.
• Be sure to blend the powder well to avoid a cakey finish.
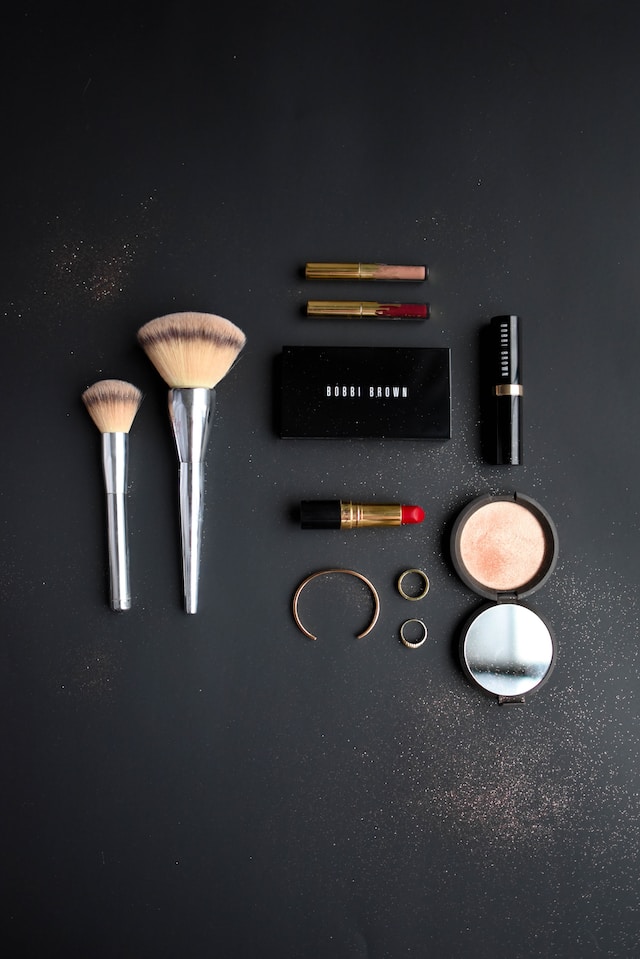
Mastering Makeup Tools: Brush and Sponge Selection and Usage
Brushes and sponges are essential tools in mastering the art of makeup application. When it comes to brushes, it is important to choose the right ones for each step of your routine. Different brushes have different purposes, whether it be for foundation, blush, eyeshadow, or highlighting. Understanding which brush to use and how to use it properly can greatly enhance your overall makeup look. Similarly, sponges can also play a crucial role in achieving a flawless finish. They are particularly useful for blending and creating a seamless appearance. Experimenting with different brushes and sponges will help you find the ones that work best for you and allow you to achieve professional-looking results.
To ensure optimal usage of brushes and sponges, proper technique is key. When using brushes, it is important to hold them correctly and apply the right amount of pressure to achieve the desired effect. For example, when applying foundation, using a flat-top brush in circular motions can provide even coverage. For eyeshadow application, investing in a set of different size and shape brushes will give you more versatility. On the other hand, sponges are best used when dampened for a more natural-looking finish. They can be used to blend foundation, concealer, or even contouring products. By mastering the technique of using brushes and sponges, you can take your makeup application skills to the next level.
• Different brushes have different purposes, such as foundation, blush, eyeshadow, or highlighting.
• Understanding which brush to use and how to use it properly can enhance your overall makeup look.
• Sponges are useful for blending and creating a seamless appearance.
• Experimenting with different brushes and sponges will help you find the ones that work best for you.
Proper technique is key when using brushes and sponges:
• Hold brushes correctly and apply the right amount of pressure for desired effect.
• Using a flat-top brush in circular motions provides even coverage for foundation application.
• Invest in a set of different size and shape brushes for more versatility in eyeshadow application.
• Dampen sponges for a natural-looking finish when blending foundation, concealer, or contouring products.
By mastering the technique of using brushes and sponges:
– You can take your makeup application skills to the next level.