Understanding the Different Eye Shapes
Understanding the Different Eye Shapes is essential when it comes to applying eye makeup. There are several eye shapes, each with its own unique characteristics and challenges. For instance, hooded eyes have a fold of skin that just covers the crease, making the eyelids appear smaller. On the other hand, almond-shaped eyes have a balanced proportion, with a slightly upturned outer corner, creating a natural lift. Additionally, round eyes have a more open appearance, while downturned eyes have a slight droop at the outer corners. By identifying your eye shape, you can enhance their natural beauty and create stunning eye makeup looks that accentuate your features.
Furthermore, the understanding of different eye shapes helps in determining the best techniques to bring out the most flattering features. For example, if you have hooded eyes, applying eyeshadow in a way that enhances the crease and creates the illusion of a larger lid can make your eyes appear more open and defined. For almond-shaped eyes, emphasizing their natural symmetry by precisely blending eyeshadow colors and extending the outer corner can enhance their beauty. By recognizing the individual qualities of your eye shape, you can experiment with different techniques and eyeshadow placement to achieve the desired effect and make your eyes stand out in a crowd.
• Hooded eyes have a fold of skin that covers the crease, making eyelids appear smaller
• Almond-shaped eyes have a balanced proportion with slightly upturned outer corners
• Round eyes have a more open appearance
• Downturned eyes have a slight droop at the outer corners
Understanding your eye shape is crucial for applying eye makeup effectively. By identifying your specific eye shape, you can tailor your makeup techniques to enhance and accentuate your natural features. Here are some tips for different eye shapes:
1. Hooded Eyes:
– Apply eyeshadow in a way that enhances the crease and creates the illusion of a larger lid.
– Use lighter shades on the inner corner and darker shades on the outer corner to add depth.
– Avoid heavy eyeliner on the upper lash line as it may further minimize the lid space.
2. Almond-Shaped Eyes:
– Emphasize their natural symmetry by precisely blending eyeshadow colors.
– Extend eyeshadow or liner slightly beyond the outer corner to create an elongated effect.
– Experiment with winged eyeliner styles to complement their upward tilt.
3. Round Eyes:
– Focus on creating dimension by using contrasting shades of eyeshadow.
– Apply darker colors along the crease and blend them outward for added depth.
– Consider using false lashes or mascara that adds length rather than volume.
4. Downturned Eyes:
• Lift and brighten by highlighting under your brow bone with light-colored shadow
• Create lift at outer corners by extending eyeliner upwards towards temples
• Curling lashes can help open up downturned eyes
Remember, these are just general guidelines, and everyone’s individual features may vary within each eye shape category. Don’t be afraid to experiment with different looks and techniques until you find what works best for you!
Choosing the Right Eyeshadow Colors for Your Eye Color
When it comes to choosing the right eyeshadow colors for your eye color, it’s essential to consider complementary shades that will enhance and bring out the natural beauty of your eyes. Blue eyes, for example, are often complemented by warm shades such as bronze, copper, and peach. These colors create a beautiful contrast and make blue eyes appear even more vibrant and striking. On the other hand, green eyes tend to pop when paired with purple, plum, and mauve shades. These cooler tones create a captivating and alluring effect, adding depth and intensity to green eyes.
For those with brown eyes, the options are endless. Brown eyes can pull off a wide range of colors, from earthy neutrals to bold jewel tones. Shades of gold, bronze, and copper can bring out the warmth and flecks of color in brown eyes, while rich greens and blues can create a stunning contrast. Experimenting with different colors and playing around with different eyeshadow palettes allows you to personalize your eye makeup and find the shades that truly make your eyes sparkle. Remember, the key is to have fun and be creative with your eyeshadow choices, as they can transform your entire look and highlight your unique eye color.
• Blue eyes are complemented by warm shades such as bronze, copper, and peach.
• These colors create a beautiful contrast and make blue eyes appear more vibrant.
• Green eyes pop when paired with purple, plum, and mauve shades.
• These cooler tones add depth and intensity to green eyes.
• Brown eyes can pull off a wide range of colors from earthy neutrals to bold jewel tones.
• Shades of gold, bronze, and copper bring out the warmth in brown eyes.
• Rich greens and blues create a stunning contrast for brown eyes.
• Experimenting with different eyeshadow palettes allows you to personalize your eye makeup.
• Have fun and be creative with your eyeshadow choices to highlight your unique eye color.
Essential Tools for Creating Eye Makeup Looks
When it comes to creating eye makeup looks, having the right tools is essential. One of the most basic tools you’ll need is a set of good quality makeup brushes. These brushes come in various shapes and sizes to help you apply eyeshadow, blend colors, and create precise lines. Look for brushes with soft bristles that are easy to clean and don’t shed.
Another must-have tool for eye makeup application is an eyelash curler. This simple device can make a big difference in the look of your lashes, giving them a natural curl and opening up your eyes. Invest in a high-quality curler that fits comfortably in your hand and has a good grip to avoid accidental pinches. For added impact, heat the curler with a blow dryer for a few seconds before using it – just be sure it’s not too hot to avoid any injury to your delicate lashes.
• Good quality makeup brushes are essential for creating eye makeup looks
• Look for brushes with soft bristles that are easy to clean and don’t shed
• Different shapes and sizes of brushes help with applying eyeshadow, blending colors, and creating precise lines
• An eyelash curler is another must-have tool for eye makeup application
• It gives your lashes a natural curl and opens up your eyes
• Invest in a high-quality curler that fits comfortably in your hand and has a good grip
• Heat the curler with a blow dryer for a few seconds before using it for added impact
• Be cautious not to make it too hot to avoid any injury to your delicate lashes
Mastering the Basic Eye Makeup Techniques
To master the basic eye makeup techniques, it is important to start with a clean canvas. Begin by prepping your eyelids with an eyeshadow primer or a concealer to create a smooth base. This will help your eyeshadows to stay in place and prevent creasing throughout the day.
Next, you’ll want to familiarize yourself with the different eyeshadow finishes and their application techniques. Matte eyeshadows are perfect for creating a soft and natural look, while shimmery and metallic shades add a touch of glamour and dimension to your eyes. Use a fluffy eyeshadow brush to blend the colors seamlessly, focusing on the crease and outer corners of your eyes for a more defined look.
For added depth and definition, learn how to properly apply eyeliner. Whether you prefer a subtle thin line or a bold winged look, steady hands and a good quality eyeliner pencil or liquid liner are key. Start by drawing short, feathery strokes along the lash line and gradually build up the desired thickness. Don’t forget to smudge the liner slightly for a softer effect.
By mastering these basic eye makeup techniques, you’ll have a solid foundation to create a variety of eye looks. Experiment with different eyeshadow colors, blending techniques, and eyeliner styles to discover what works best for you. With practice and confidence, your eye makeup skills will continue to improve, allowing you to elevate your beauty game and express your personal style.
• Prep your eyelids with an eyeshadow primer or concealer for a smooth base
• Familiarize yourself with different eyeshadow finishes (matte, shimmery, metallic)
• Use a fluffy eyeshadow brush to blend colors seamlessly
• Focus on the crease and outer corners of your eyes for more definition
• Learn how to properly apply eyeliner for added depth and definition
• Use steady hands and a good quality eyeliner pencil or liquid liner
• Start by drawing short, feathery strokes along the lash line
• Gradually build up thickness according to desired look
• Smudge the liner slightly for a softer effect
• Experiment with different eyeshadow colors, blending techniques, and eyeliner styles
to find what works best for you.
Creating a Natural Eye Makeup Look
Soft and Subtle: When it comes to creating a natural eye makeup look, the key is to enhance your features without overpowering them. Start by applying a neutral eyeshadow shade all over your lid, focusing on colors that match your skin tone. This will create a soft and subtle base for your eye makeup. Avoid using dark or bold colors as they can make the look appear more dramatic. Instead, opt for light brown, taupe, or beige shades to enhance your natural beauty.
Natural Definition: To add definition to your eyes while keeping the look natural, use a matte brown eyeshadow shade in the crease of your eyelid. Focus on blending the color seamlessly to create a soft transition. This will help to create depth and dimension to your eyes without appearing heavy or overly made up. Remember to keep the color application minimal and build it up slowly, allowing you to control the level of intensity and maintain the natural appearance.
• Apply a neutral eyeshadow shade all over your lid, matching your skin tone
• Avoid using dark or bold colors for a more natural look
• Opt for light brown, taupe, or beige shades to enhance your natural beauty
• Use a matte brown eyeshadow shade in the crease of your eyelid for definition
• Blend the color seamlessly for a soft transition
• Keep the color application minimal and build it up slowly
Enhancing Your Eyes with Smokey Eye Makeup
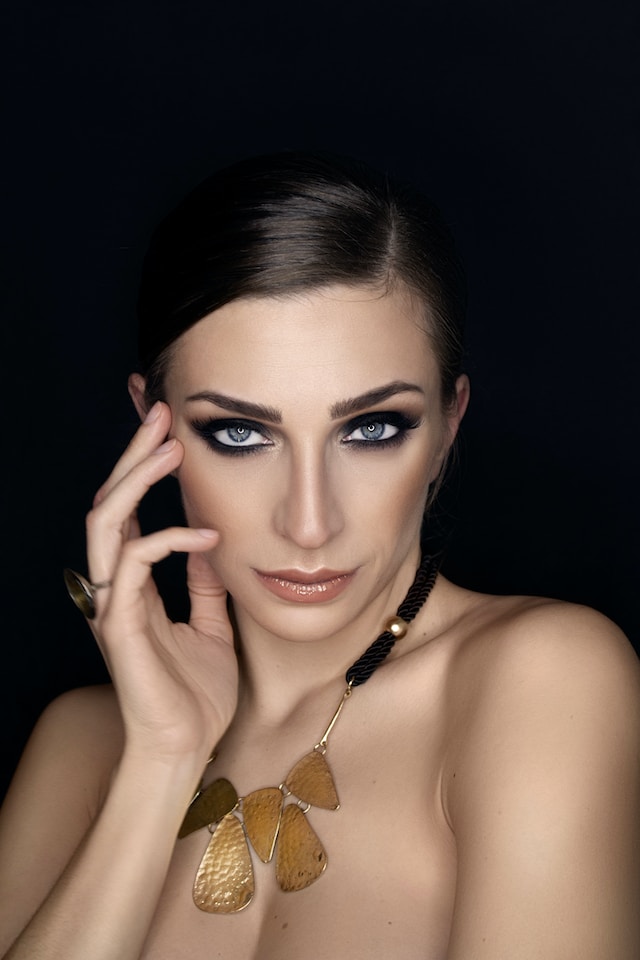
Smokey eye makeup is a classic and timeless look that can enhance your eyes and add a touch of allure to your overall appearance. This dramatic eye makeup style involves blending different shades of eyeshadow to create a smoky effect around the eyes. By using darker colors on the outer corners and lighter shades towards the inner corners, you can achieve a gradient effect that adds depth and dimension to your eyes.
To create a smokey eye, start by prepping your eyelids with a primer to ensure that your eyeshadow stays in place all day. Next, choose a dark eyeshadow color that complements your skin tone, such as black, deep brown, or gray. Apply the darkest shade to the outer corners of your eyes, blending it inwards towards the center of your eyelids. Then, use a lighter shade to blend into the crease and the inner corners of your eyes, gradually softening the intensity. Finish off the look with a little smudged eyeliner and a couple of coats of volumizing mascara for a sultry and seductive finish.
• Use a primer to prep your eyelids before applying eyeshadow
• Choose a dark eyeshadow color that complements your skin tone
• Apply the darkest shade to the outer corners of your eyes and blend inwards
• Use a lighter shade to blend into the crease and inner corners of your eyes
• Gradually soften the intensity of the eyeshadow as you apply it towards the center of your eyelids
• Smudge eyeliner for a more smoky effect
• Finish off with volumizing mascara for added allure.
Experimenting with Bold and Vibrant Eye Makeup Looks
For those who are feeling playful and adventurous with their makeup, experimenting with bold and vibrant eye makeup looks can be a fun way to express their creativity. Bold and vibrant eye makeup looks are all about making a statement and standing out from the crowd. With a wide range of colors and techniques to choose from, there are endless possibilities to explore.
When it comes to creating bold and vibrant eye makeup looks, one key element is choosing the right eyeshadow colors. Bright, vivid shades like electric blue, fiery orange, or vibrant purple can instantly add a pop of color and intensity to your eyes. Paired with a neutral base and blended well, these colors can create a stunning contrast that is sure to catch everyone’s attention. Additionally, experimenting with different finishes like shimmers or metallics can further enhance the overall effect and create a mesmerizing look. So, don’t be afraid to step outside your comfort zone and play with bold and vibrant eye makeup looks to unleash your inner artist.
• Choosing the right eyeshadow colors is key to creating bold and vibrant eye makeup looks.
• Bright, vivid shades like electric blue, fiery orange, or vibrant purple can add a pop of color and intensity to your eyes.
• Pairing these bold colors with a neutral base and blending well creates a stunning contrast.
• Experimenting with different finishes like shimmers or metallics can enhance the overall effect.
• Stepping outside your comfort zone and playing with bold eye makeup looks allows you to unleash your inner artist.
Tips for Applying Eyeliner like a Pro
When it comes to eyeliner application, precision is key. To achieve a professional-looking result, you should start by choosing the right type of eyeliner for your desired look. Pencil eyeliners are great for beginners as they offer more control, while liquid eyeliners provide a bold and defined line. Gel eyeliners, on the other hand, are perfect for creating a smudged or smokey effect. Once you have chosen your preferred eyeliner, it’s important to have a steady hand and a good grip on the applicator. To avoid smudging and mistakes, you can rest your elbow on a table while applying eyeliner or use a magnifying mirror for a closer view.
Another tip for applying eyeliner like a pro is to utilize short, connecting strokes rather than attempting to draw a continuous line. By breaking up the line into small strokes, you have more control over the shape and thickness of the liner. Start at the inner corner of your eye and work your way outward, gradually applying more pressure to create a thicker line if desired. Remember to keep the line as close to your lash line as possible for a natural and seamless look. If you prefer a more dramatic effect, you can extend the line slightly beyond the outer corner of your eye in a gentle, upward flick. Regardless of the style you choose, practice makes perfect, so don’t be discouraged if it takes a few tries before achieving the desired result.
• Choose the right type of eyeliner for your desired look: pencil, liquid, or gel
• Have a steady hand and a good grip on the applicator
• Rest your elbow on a table or use a magnifying mirror for better control
• Use short, connecting strokes instead of trying to draw a continuous line
• Start at the inner corner of your eye and work outward
• Gradually apply more pressure to create a thicker line if desired
• Keep the line as close to your lash line as possible for a natural look
• Extend the line slightly beyond the outer corner for a dramatic effect
Achieving Long and Luscious Lashes
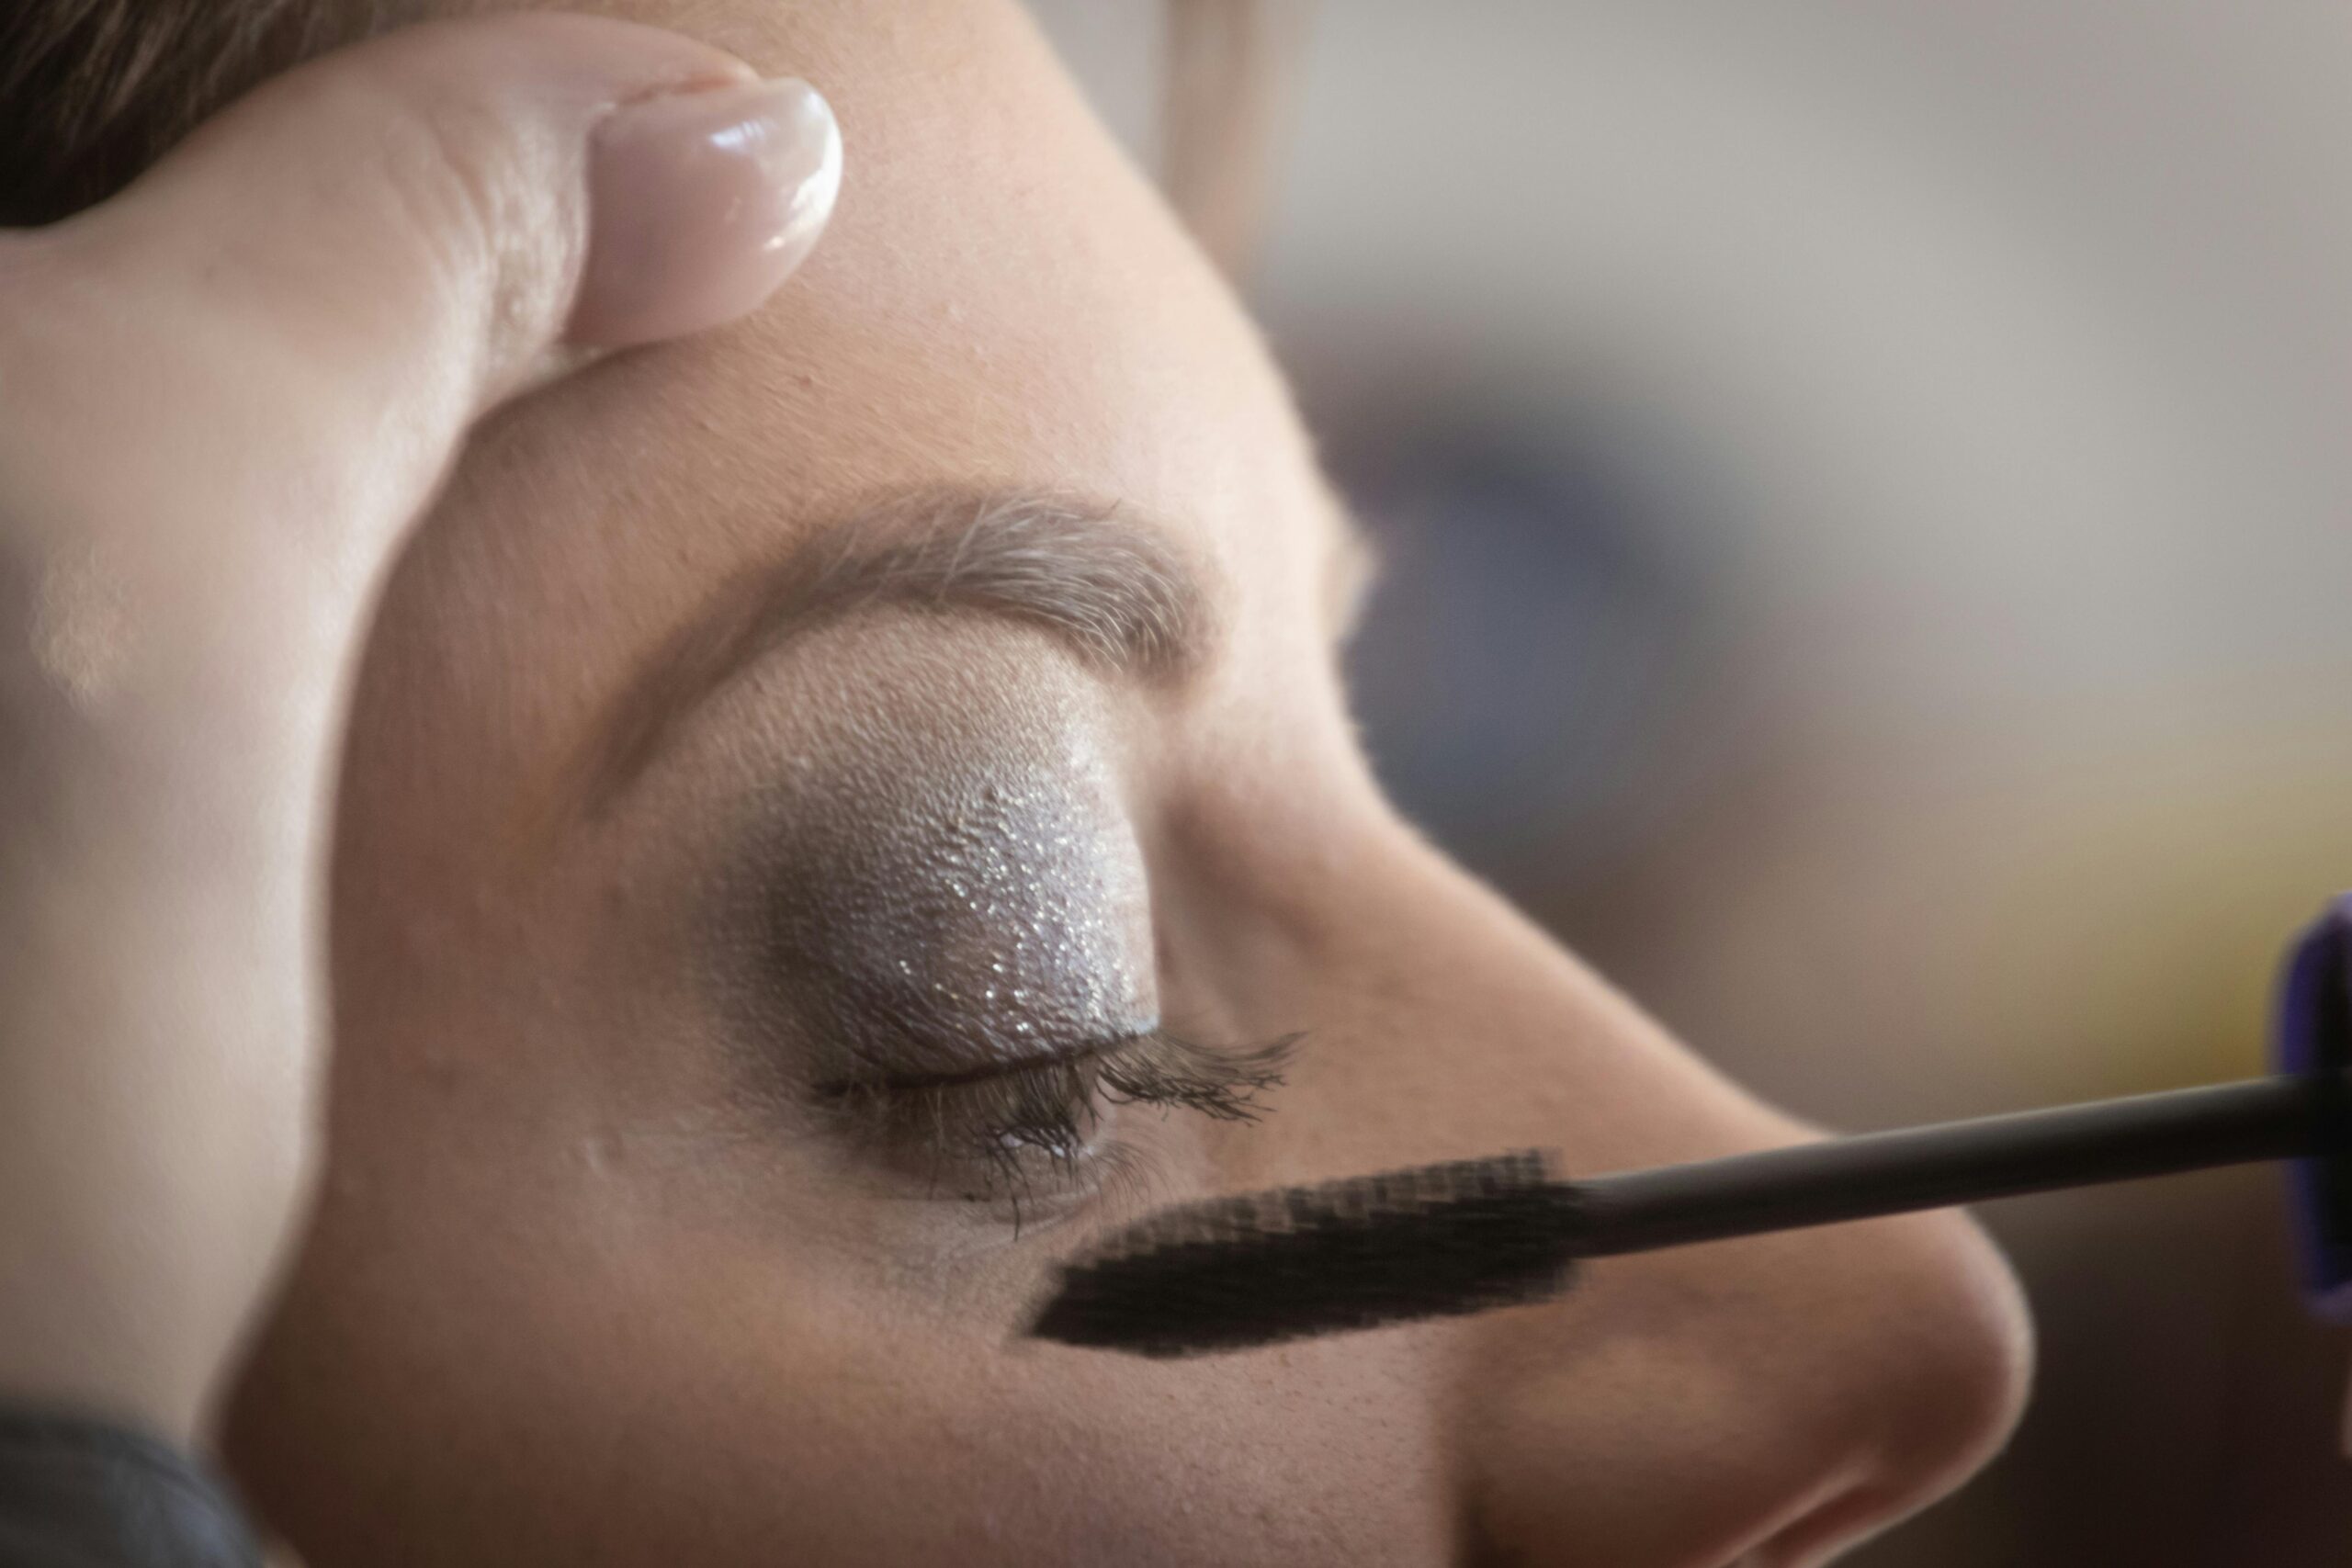
Beautiful and long lashes are a coveted feature for many individuals. Fortunately, there are several techniques and products available to help you achieve the look of long and luscious lashes. Mascara is a common go-to product for enhancing lashes as it adds volume, length, and definition. When applying mascara, start by curling your lashes with an eyelash curler. This step helps to lift the lashes and create a more open and awake look. Then, carefully apply the mascara from the base of the lashes to the tips, wiggling the wand slightly to separate and coat each lash evenly. For added drama, you can apply multiple coats, allowing each coat to dry slightly before applying the next.
In addition to mascara, false eyelashes can also provide a dramatic effect. False eyelashes come in a variety of styles, from natural-looking to bold and dramatic. To apply false lashes, start by measuring them against your natural lash line and trim them if necessary. Apply a thin layer of lash adhesive along the base of the false lashes and wait a few seconds for it to become slightly tacky. Looking downward into a mirror, carefully place the false lashes as close to your natural lash line as possible, pressing them gently into place. Once the lash adhesive has dried, you can apply mascara to blend your natural lashes with the false lashes for a seamless finish.
Achieving long and luscious lashes can truly enhance your eye makeup look and make your eyes pop. Whether you prefer the natural look provided by mascara or the drama of false lashes, these techniques will help you achieve the desired effect. Experiment with different products and styles to find what works best for you, and don’t hesitate to seek advice from beauty professionals if you need additional guidance.
• Mascara is a popular choice for enhancing lashes
• Start by curling your lashes with an eyelash curler
• Apply mascara from the base to the tips, wiggling the wand to separate and coat each lash evenly
• For added drama, apply multiple coats, allowing each coat to dry slightly before applying the next
• False eyelashes can provide a dramatic effect
• Measure them against your natural lash line and trim if necessary
• Apply a thin layer of lash adhesive along the base of the false lashes and wait for it to become tacky
• Carefully place the false lashes as close to your natural lash line as possible, pressing them gently into place
• Once dried, apply mascara to blend your natural lashes with false ones
– Experiment with different products and styles
– Seek advice from beauty professionals if needed
Final Touches: Eyebrows and Mascara
Eyebrows and mascara: two final touches that can truly transform your eye makeup look. When it comes to eyebrows, they play a crucial role in framing your eyes and enhancing your overall facial appearance. Taming unruly brows and filling in any sparse areas can make a world of difference. To achieve perfectly groomed eyebrows, start by brushing them upwards with a spoolie brush. Then, using an eyebrow pencil or powder that matches your natural hair color, gently fill in any gaps or sparse areas with short, feather-like strokes. Remember to blend the product for a more natural look. Finally, set your brows in place with a clear brow gel for a polished finish.
Now, let’s talk about mascara, the ultimate tool for achieving long and luscious lashes. Mascara can instantly open up your eyes and give your lashes the volume and length they deserve. When selecting a mascara, consider factors such as the formula (waterproof or regular), the brush shape (straight or curved), and the desired effect (lengthening, volumizing, or curling). To apply mascara like a pro, start at the base of your lashes and wiggle the wand back and forth to ensure every lash is coated. Then, slowly sweep the wand upwards to the tips of your lashes, repeating this motion a few times for added intensity. Be sure to let the mascara dry in between coats to avoid clumping. And remember, one of the most important aspects of mascara application is to take your time and be gentle to prevent any smudging or flaking.
• Brush eyebrows upwards with a spoolie brush to start grooming them
• Fill in any gaps or sparse areas with an eyebrow pencil or powder that matches your natural hair color
• Use short, feather-like strokes for a more natural look
• Blend the product for a seamless finish
• Set your brows in place with clear brow gel for a polished appearance
– Consider factors such as formula, brush shape, and desired effect when selecting mascara
– Start at the base of lashes and wiggle the wand back and forth to coat every lash
– Slowly sweep the wand upwards to the tips of lashes for added intensity
– Let mascara dry between coats to avoid clumping
– Take your time and be gentle during application to prevent smudging or flaking.